Scaling a business globally shouldn’t mean wrestling with crypto volatility, fragmented tools, or unpredictable fees. That’s why NOWPayments exists as a complete business ecosystem that brings together payments, mass payouts, conversions, and treasury management under one roof.
To make onboarding even smoother, we’ve created two interactive resources that let you explore the platform hands‑on before writing a single line of code:
- Interactive Personal Account Overview (Dashboard Walkthrough): A clickable tour of the NOWPayments dashboard where you can see how to generate API keys, track payments, configure mass payouts, and manage your settings.
- Interactive Integration Guide: A step-by-step, guided demo that shows the actual API workflow with live examples, from creating an invoice to handling payment statuses and testing in sandbox mode.
These integration materials walk you through everything you need to start accepting crypto payments via NOWPayments, managing stablecoin settlements, and scaling your operations, whether you run an online store, a B2B platform, or a global affiliate network.
Integration Steps
Step 1. Sign Up for NOWPayments
- Start with a NOWPayments account.
If you already have one, just log in, there is no extra setup needed at this stage.
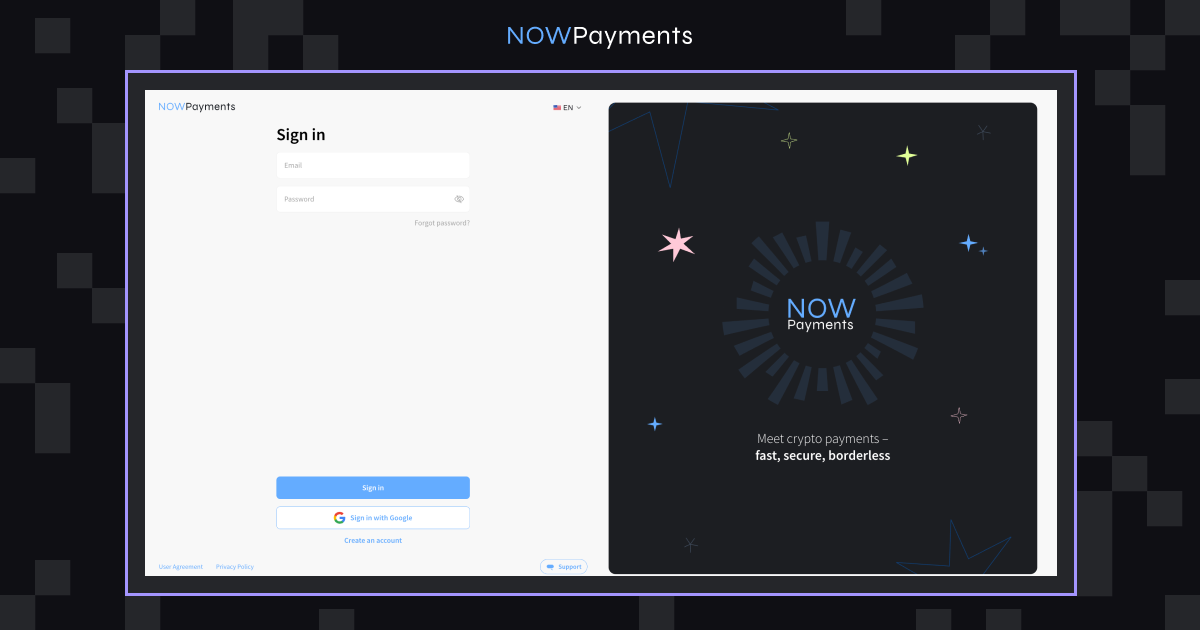
- Receive a verification email and confirm
- Once registered, log in to your NOWPayments dashboard.
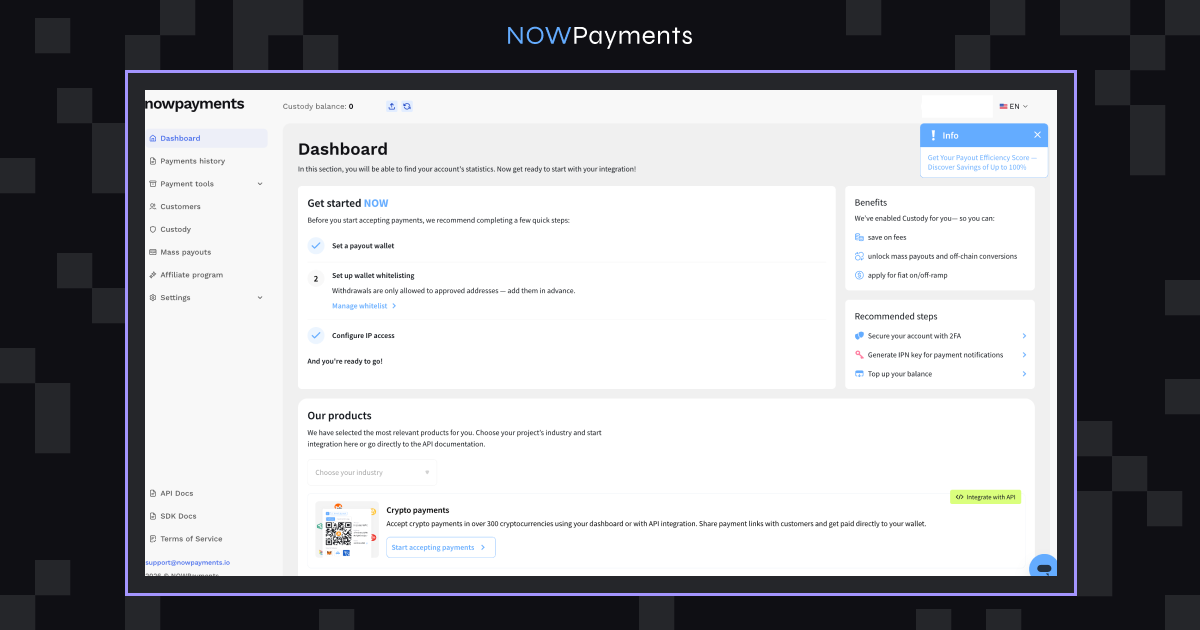
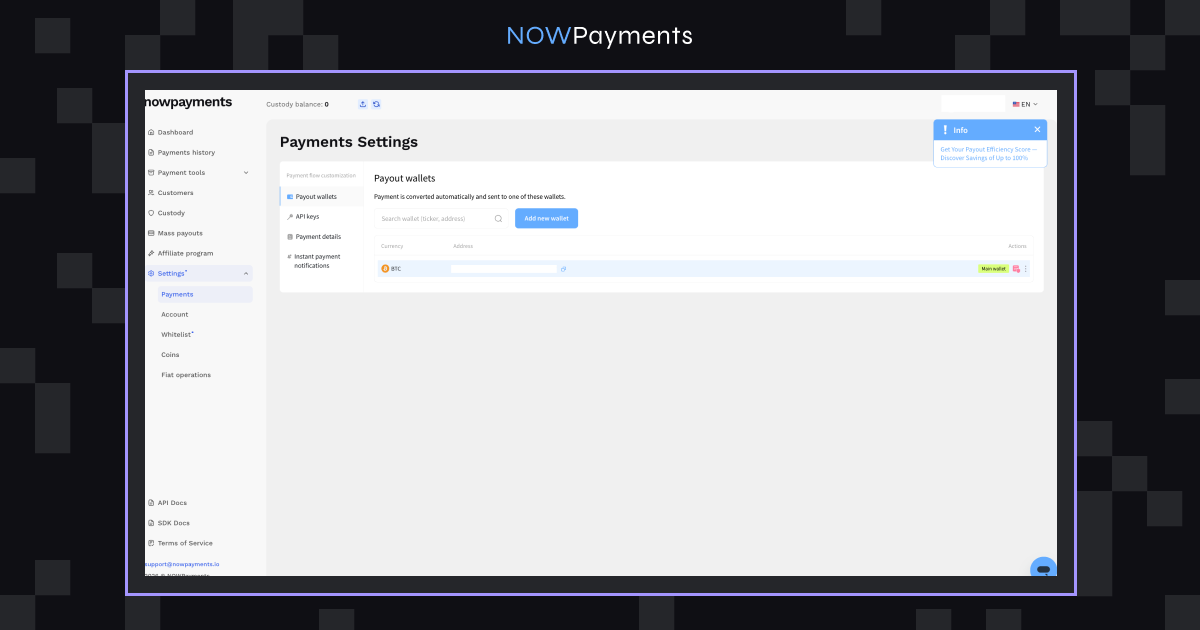
- Add your payout wallet
- Generate Your API Key
Go to your dashboard → API Settings → generate your API key.

Step 2: Set Up Your Account
- Go to coin settings and choose which currencies you wish to enable for your customers to pay.

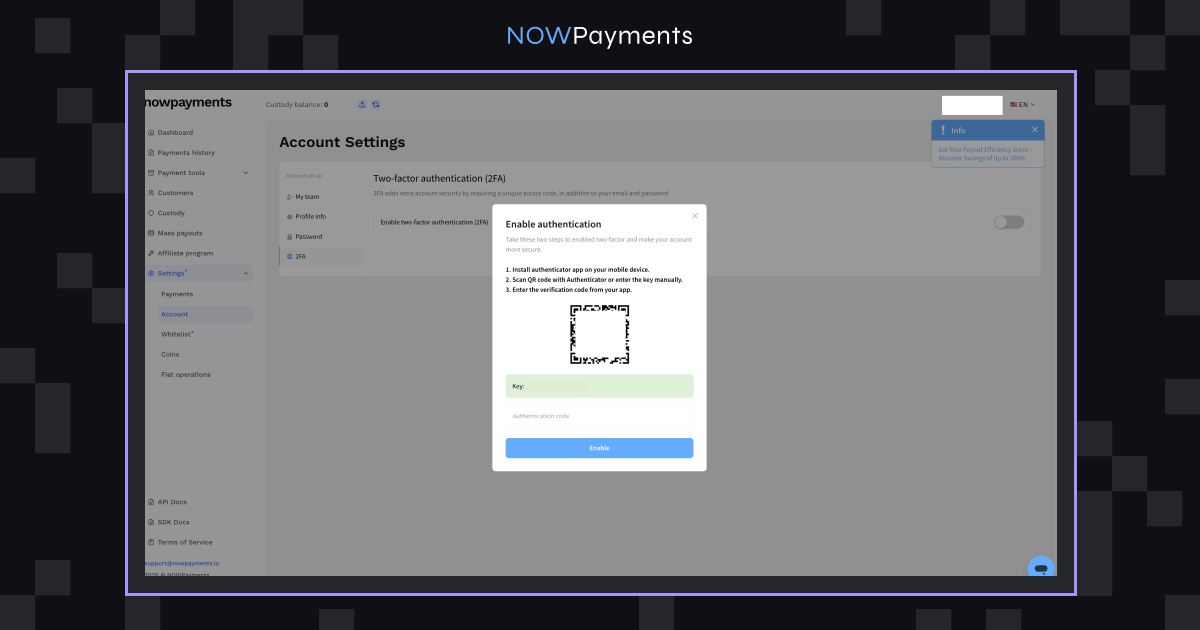
- Enable 2FA for better security and save your backup code or use an app.
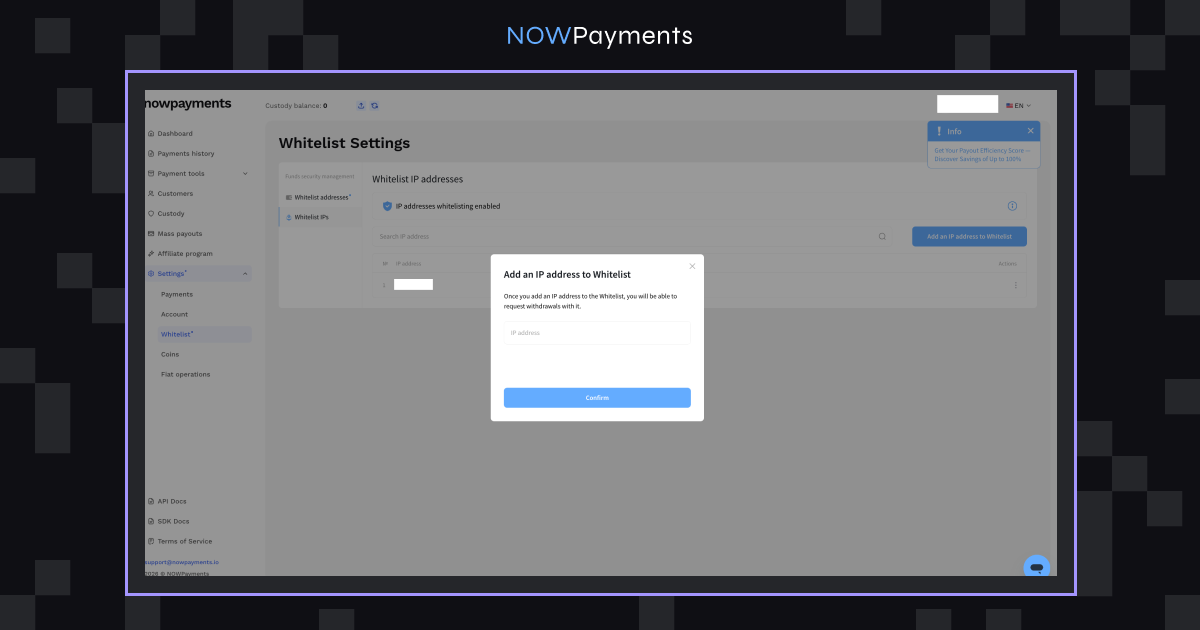
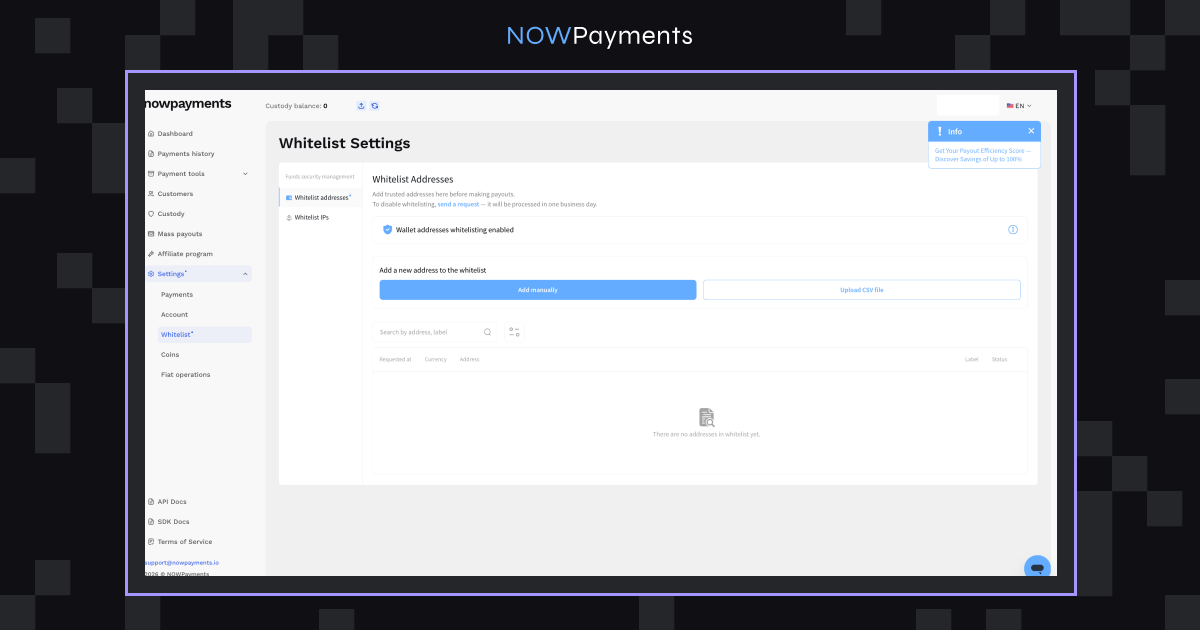
- Whitelist IPs and Wallet Addresses
- Add your IP address in Whitelist IPs, including IPv6 and IPv4
- Add recipient wallet addresses:
- Manually
- Or via CSV
Step 3. Choose the Crypto Payments Tools you need
Now that your account is set up, select the integration method that best fits your business:
- For developers & full control → API
- Crypto payments API docs
- SDK Demo
- Node.js SDK on GitHub
- Payment API
- Mass Payouts API
- Custody API
- Customer Management API
- Recurring Payments API
- Fiat Withdrawals API
- For quick, no‑code setup → Plugins
- Woocommerce Plugin
- WHMS Plugin
- For links & invoices → Invoices
- For a no‑code, embedded checkout → Payment Widget
- For a simple, redirect‑based button → Payment Button
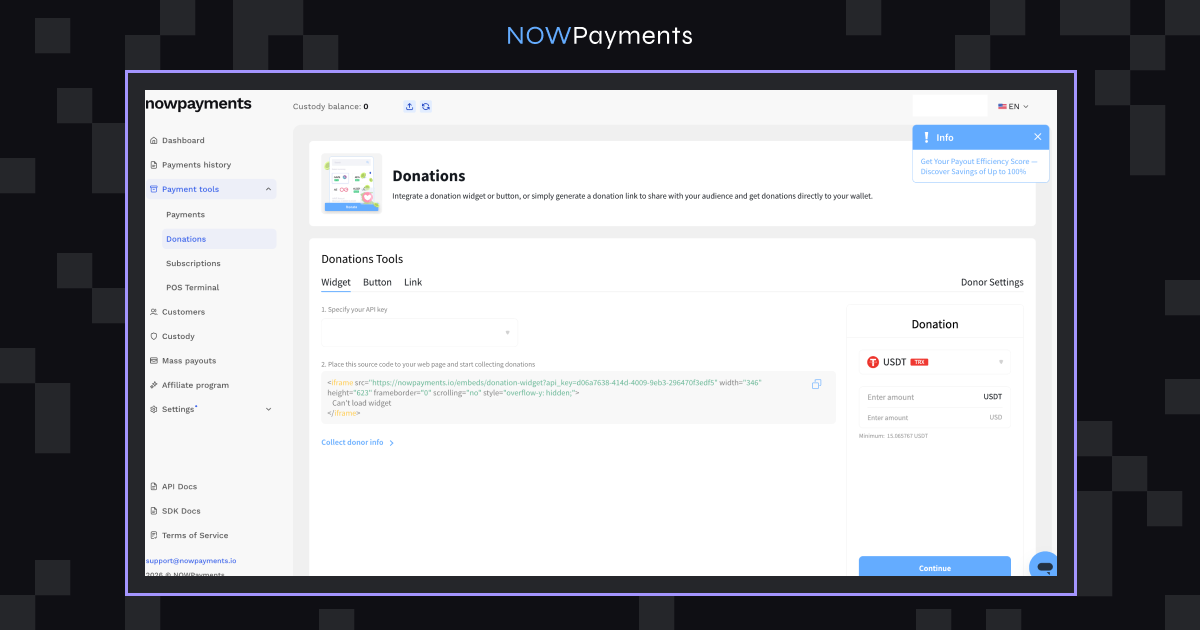
- For donations, fundraising & tips → Donation Tools
- For physical retail stores → Point‑of‑Sale (POS) Solution
- Treasury & Payouts Solutions → Mass Payouts
- Standard Mass Payouts
- Payouts to ChangeNOW Pro wallets
Step 4. Monitor Transactions in Real Time
The dashboard gives you full visibility:
- Waiting
- Confirming
- Confirmed
- Sending
- Partially_paid
- Finished
- Failed
- Refunded
- Expired
Find out more about the available statuses for payments in our API documentation.
You always know what’s happening with your transactions without any guesswork.
Integration Tools
You’ve set up your NOWPayments account, and now it’s time to decide how you’ll actually accept crypto from your customers. The right choice depends on whether you run an e‑commerce store, a service business, a physical retail shop, or a donation‑driven project. Below, we walk through every integration tool NOWPayments offers, highlighting the advantages of each and the types of businesses they serve best.
| Tool | Key Features | Technical Effort | Customer Experience |
| API | Full control; mass payouts, recurring, fiat withdrawals; dev‑friendly docs | High (developer) | Fully custom |
| SDK | Full API coverage; type safety; async; multi‑language | Medium (developer) | App‑native |
| Plugins | One‑click install; native checkout; auto updates; WooCommerce/WHMCS only | Low (no coding) | Embedded checkout |
| Invoices | Branded; QR + link; fixed/floating rates; webhooks | Low | Link or email |
| Payment Widget | On‑site (no redirect); custom fields; brand matching; copy‑paste embed | Low (copy‑paste) | On‑site |
| Payment Button | Zero code (HTML); fiat on‑ramp; real‑time status | Minimal (paste HTML) | Redirect or pop‑up |
| Donation Tools | No‑code; recurring; auto‑conversion; no chargebacks | Minimal | Widget / link / button |
| Point of Sale | No extra hardware; fiat settlement; offline mode; no chargebacks | Low (dashboard) | In‑person |
| Mass Payouts | Bulk transfers (API/CSV); zero fees; 350+ currencies | Medium (API/dashboard) | Automated |
| ChangeNOW Pro Payouts | Email‑based; instant & free; auto‑accounts; no error risk | Low (via dashboard and email-based payouts) | Simple for recipients |
API
Main advantages:
- Full control: Customize every part of the payment flow.
- Advanced capabilities: Mass payouts, customer management, recurring payments, fiat withdrawals.
- High performance: 99.99% uptime, ~350ms response time, near‑instant confirmations.
- Developer friendly: Extensive documentation and clear endpoints.
Best suited for:
- SaaS platforms
- Marketplaces
- Gaming and iGaming platforms
- Trading platforms
- Custom apps
- Businesses with high‑volume or advanced payment flows
Here is the NOWPayments API page, where you can learn how the API helps build flexible crypto payment infrastructure.
For detailed setup and technical implementation, you can also check out the NOWPayments API documentation on Postman.
SDK
Main advantages:
- Complete API coverage: All payment, subscription, and payout endpoints.
- Type safety: Full type hints for better development.
- Async support: Synchronous and asynchronous methods.
- Multi-language: Node.js, Python, Ruby, and more.
Best suited for:
- Developers building mobile apps or custom frontends
- Teams wanting to integrate crypto payments with minimal code
- Projects that need a structured, production‑ready SDK
Here is the SDK Demo to see it in action.
Check out the Node.js SDK on GitHub, where you can access full documentation and code examples.
Plugins
Main advantages:
- One‑click installation: Add crypto payments in minutes, no coding.
- Native checkout: Crypto appears inside your existing checkout.
- Automatic updates: New features and security patches without extra work.
- Platform optimized: Built specifically for WooCommerce and WHMCS.
Best suited for:
- WooCommerce store owners
- WHMCS hosting providers
- Small and medium‑sized e‑commerce businesses looking for a fast setup
Here is the NOWPayments WooCommerce and WHMCS plugin page, where store owners can learn how to add crypto payments to their checkout.
Invoices
Main advantages:
- Branded invoices: Add your logo and company details.
- QR code & payment link: No wallet address errors.
- Fixed or floating rates: Lock the rate or let it float.
- Webhook callbacks: Instant payment notifications for automated fulfillment.
Best suited for:
- Freelancers
- Agencies
- Consultants
- B2B service providers
- Remote teams
- Businesses that bill clients manually
Here is the NOWPayments Invoices page, where businesses can learn how crypto invoices simplify client payments and billing.
Payment Widget
Main advantages:
- On‑site checkout: No redirects, higher conversions.
- Customizable fields: Collect email, address, or any data.
- Brand matching: Change colors, fonts, and layout.
- Simple embed: Copy and paste, works on any platform.
Best suited for:
- Online stores
- Service websites
- Digital product sellers
- Creators
- Small businesses
- Websites that need a lightweight crypto checkout option
Here is the NOWPayments Payment Widget guide, where you can learn how the widget works and how it helps businesses accept crypto payments on their websites.
Businesses can also visit the Payment Widget page to explore the tool directly.
Payment Button
Main advantages:
- Zero coding: Generate a button and paste one line of HTML.
- Price flexibility: Set fiat prices; customer pays crypto equivalent.
- Fiat on‑ramp: Customers pay with a card, and you receive crypto.
- Real‑time status: Instant payment confirmations.
Best suited for:
- Digital product sellers
- Creators
- Small businesses
- Service providers
- Businesses selling a limited number of products or services
Here is the NOWPayments Payment Button guide, where you can learn how businesses can use a payment button to accept crypto without building a complex integration.
You can also visit the Payment Button page to explore the tool.
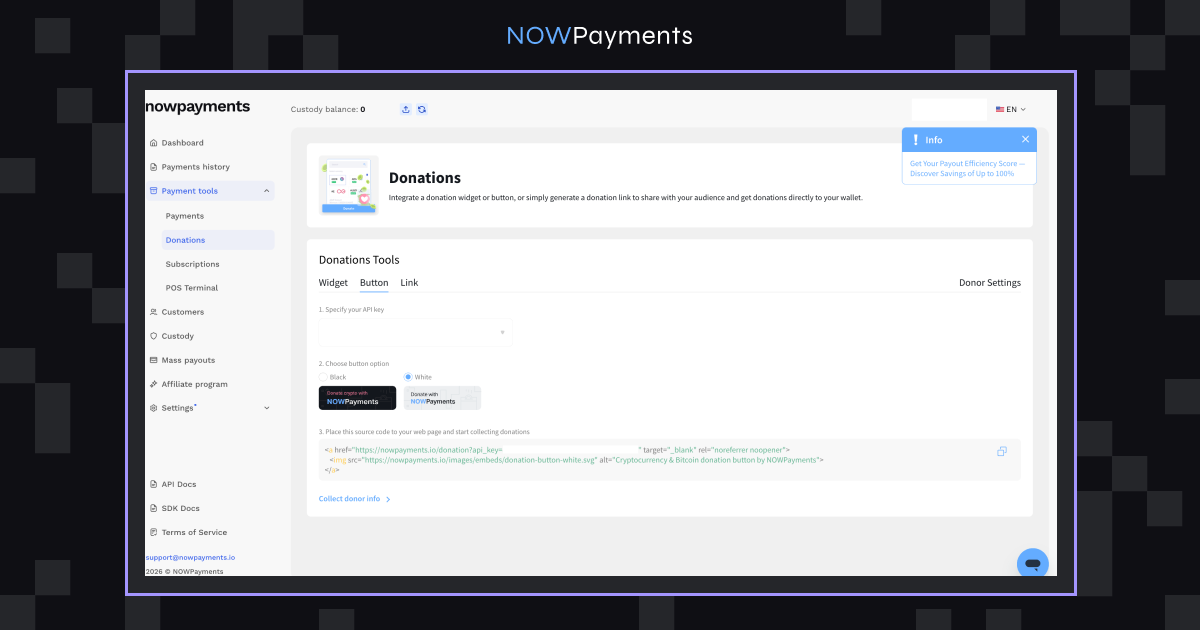
Donation Tools
Main advantages:
- No‑code setup: Create donation links, widgets, or buttons in minutes.
- Recurring donations: Supporters can subscribe monthly.
- Auto‑conversion: Convert crypto to stablecoins or fiat automatically.
- No chargebacks: Funds are yours with no forced refunds.
Best suited for:
- Charities
- NGOs
- Fundraising campaigns
- Content creators
- Streamers
- Open‑source projects
- Nonprofit organizations
- Community‑based projects
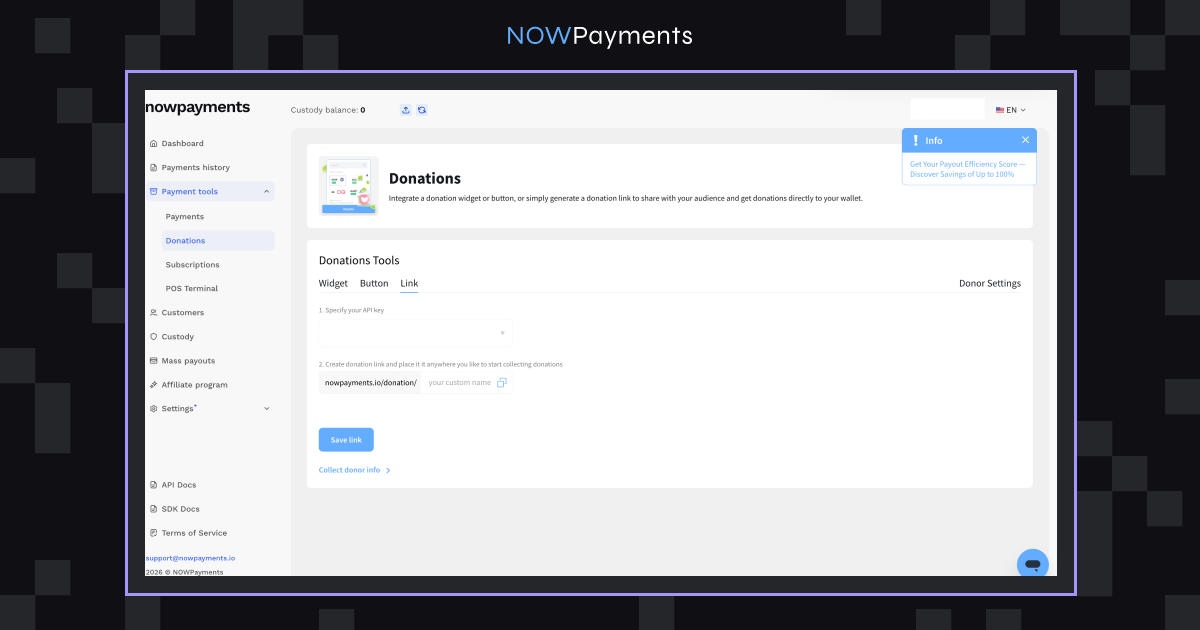
Here is the NOWPayments Donation Tools guide, where you can learn how crypto donation tools support fundraising and community‑based projects.
They can also visit the Donation Tools page to explore the solution.
Point of Sale
Main advantages:
- No extra hardware: Works on any tablet or smartphone.
- Fiat settlement: You withdraw to your bank account in local currency.
- Offline‑friendly: Accept payments even with intermittent internet.
- No chargebacks: Final transactions, no refund risk.
Best suited for:
- Retail businesses
- Pop‑up shops
- Local service providers
- Hotels
- Hospitality businesses
- Business accepting face‑to‑face payments
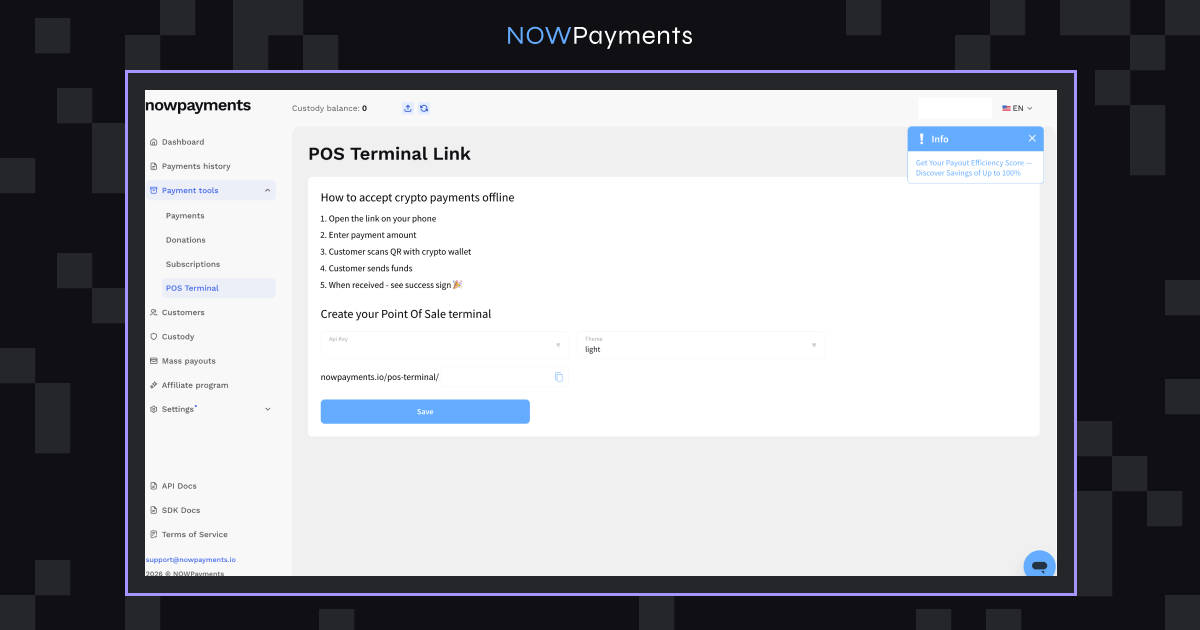
Here is the NOWPayments Point of Sale page, where you can learn how to accept crypto payments in physical locations.
Treasury & Payouts Solutions
Mass Payouts
Main advantages:
- Bulk transfers: One API call or dashboard upload for thousands of payments.
- CSV automation: Upload a spreadsheet with addresses and amounts.
- Zero service fees: No extra charges for mass payouts.
- Global reach: Over 350 currencies, worldwide.
Best suited for:
- Payroll for global teams
- Affiliate and commission payouts
- Freelancer and contractor payments
- Gaming rewards, incentives, and airdrops
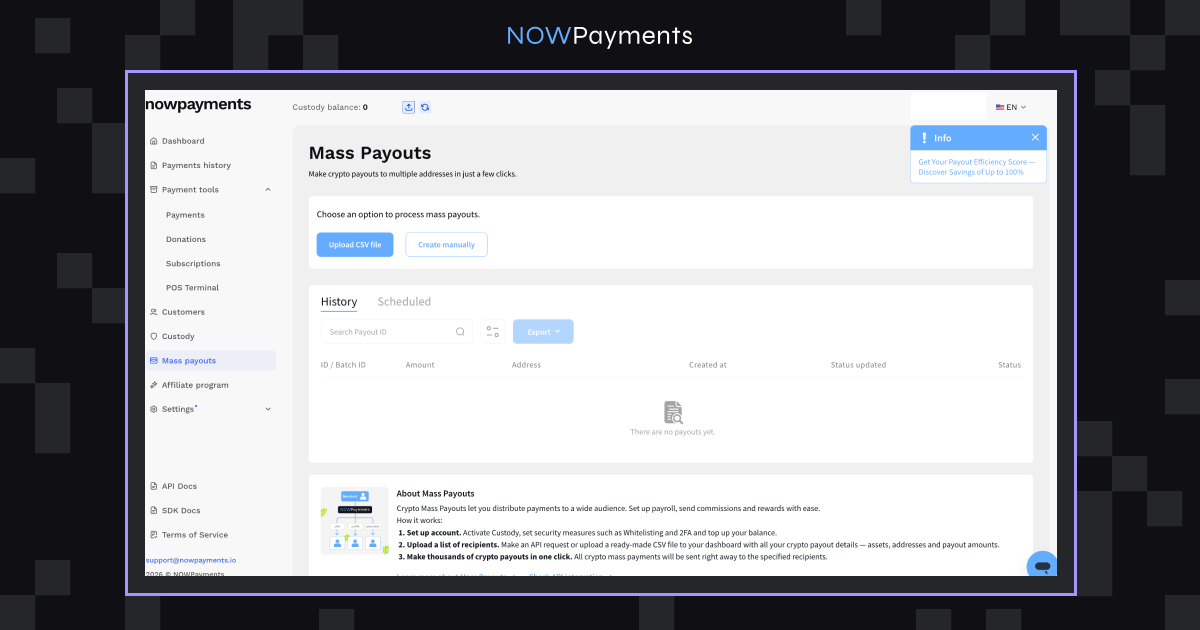
Here is the NOWPayments Mass Payouts guide, where you can learn how to automate bulk crypto transfers and save on transaction costs.
ChangeNOW Pro payouts
Main advantages:
- Email‑based: Send using only the recipient’s email address.
- Instant & free: Under one second, zero network or service fees.
- Auto‑accounts: Recipients get a wallet automatically.
- No error risk: No address mistakes or failed transactions.
Best suited for:
- Businesses paying out prizes, commissions, or bonuses
- Companies onboarding crypto‑new recipients
- Organisations wanting the simplest possible payout flow
Here is the ChangeNOW Pro Payouts guide, where you can discover how email‑based crypto payouts eliminate friction and reduce costs.
Custody
NOWPayments is custodial by default. This means you can receive crypto payments directly into your NOWPayments account balance without connecting an external wallet first. Custody helps you simplify setup and manage funds more flexibly. You can still switch back to non‑custodial processing at any time by adding a payout wallet and disabling custodial mode.
Main advantages:
- Default for new accounts
- Off‑chain conversions
- Mass payouts ready
- Secure storage
- Primary balance currency
- Multiple balances
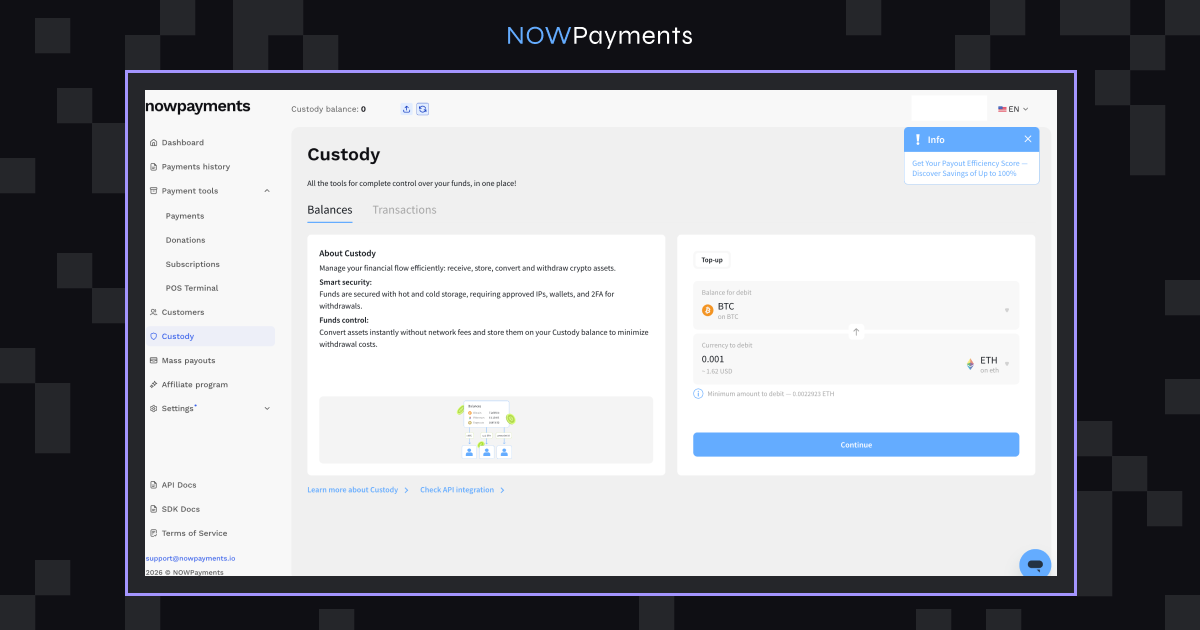
Here is the Custody Balances guide to learn how to set your primary currency, manage multiple balances, and switch back to non‑custodial processing.
Supported Cryptocurrencies
Crypto volatility doesn’t belong in your cash flow. That’s why NOWPayments focuses on stablecoins pegged to fiat currencies like the US dollar. With over 30 stablecoins supported across multiple blockchains, we give you the predictability of traditional currency and the efficiency of crypto payments, all inside one business ecosystem.
What we offer:
- USDT & USDC: Most trusted stablecoins on Tron, Ethereum, BSC, Solana, Polygon, and more.
- Settlement flexibility: Auto‑convert to your preferred stablecoin or hold as received.
- Sub‑minute payments: 99% confirm in under 1 minute.
- Mass payouts ready: Bulk transfers, including payouts to ChangeNOW Pro wallets in <1 second.
- Real‑time status: Live availability and minimum amounts on our status page.
Visit the Stablecoin Payments page to see the full list of supported stablecoins and chains.
Use the Status Page for real‑time updates on each asset.
Pricing
Transparent, predictable pricing is part of being a reliable business infrastructure partner. NOWPayments’ fee structure is designed to be straightforward and competitive. Our goal is to make high‑volume processing and global payouts cost‑efficient, not to profit from hidden complexity.
Standard Deposit Fees
- Single‑currency payments: 1% standard rate
You receive funds in the same cryptocurrency your customer pays (e.g., pay in USDT, receive USDT). - Multi‑currency payments: 1.5% standard rate
Your customer pays in one crypto, and you receive a different crypto or stablecoin after auto‑conversion.
How to Reduce Your Deposit Fees
Partners can lower their deposit service fees through:
- Voluntary verification (KYC/KYB)
- Using ChangeNOW Pro payouts
- Long‑term partnership discounts
Depending on eligibility and selected services, deposit service fees can be reduced to as low as 0.3% for single‑currency payments.
Other Pricing Details
- Conversions – 0.5% (off‑chain custody swaps, no gas fees)
- Payouts – 0% service fee (you only pay blockchain network fees)
- ChangeNOW Pro payouts – $0 network fee (instant, email‑based, no wallet required)
- Integration & setup – Free
- Dedicated support & account optimization – Free
For a complete breakdown of all fees, visit the official NOWPayments Pricing page.
Conclusion
Integrating crypto payments isn’t just about adding a new checkout option, it’s about building a more efficient, globally ready business infrastructure. With NOWPayments, you’re not getting a generic payment processor, you’re joining an ecosystem designed for sustainable growth. It offers your business stablecoin-first settlement, sub‑minute payment confirmations, mass payouts, and enterprise-grade support for high-volume processing. Whether you’re a developer building a custom integration with our API or a WooCommerce store owner using our one-click plugin, you now have the tools to scale revenue, reduce operational friction, and focus on what matters for growing your business.